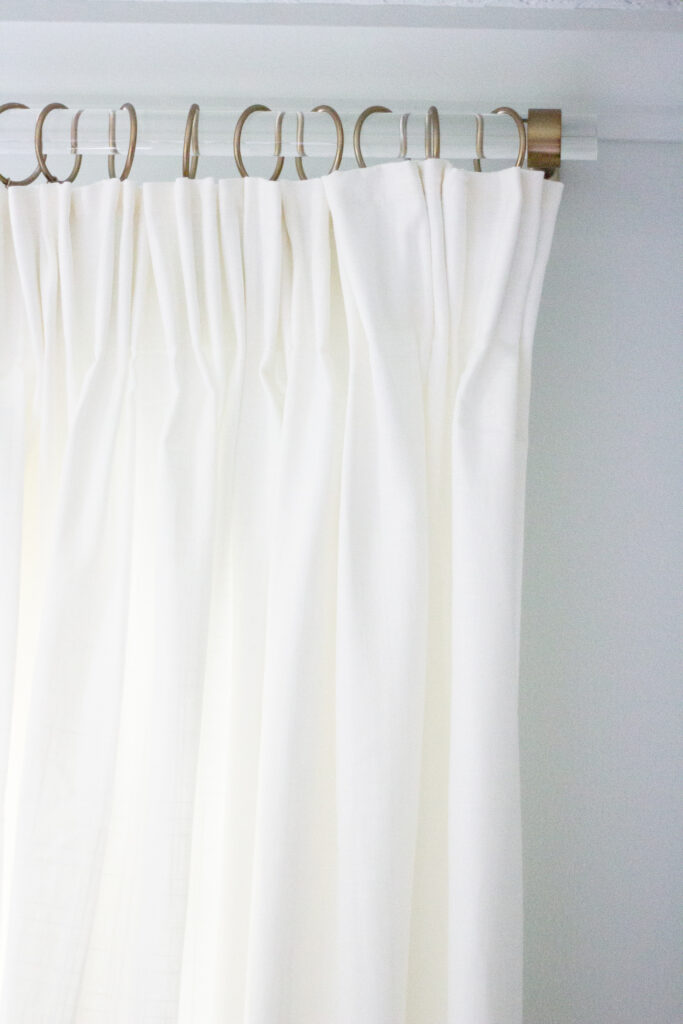
In true #grandmillenial fashion, I love a good pleat! Pleated pants, pleated lampshades and you guessed it, pleated drapes! We sold the drapes in our last home with the house since they were a custom length designed specifically for that space. We likely won’t be in the fixer-upper too too long so I didn’t want to invest in custom drapes, only to sell them with the house again. I found some pretty ready-made pinch pleat drapes but they’d still need to be hemmed to fit our shorter ceilings and even for ready-made panels, everything I seemed to fall for was still more than I wanted to spend. This led me to a Pinterest search for DIY pinch pleat curtains. Unfortunately I cannot sew and really don’t have the energy to pick up a new skill right this minute, so I had to settle for no-sew DIY’s! I did a ton of research and ended up “hacking” the IKEA Ritva drapes!
Per panel, these drapes are about $15 (sold in sets of two for $29 at IKEA) in the 98″ length. With the added cost of pleat hooks, drapery rings and hem tape – you’re still under $30 per panel which means you’ve saved some SERIOUS dough. This is the perfect project for a flip house or rental! I truly can’t get over how pretty they turned out for the price. They’re available in 118 and 98-inch sizes. We would be hemming ours either way so I went with the less expensive 98″ panels.
Ikea has lots of options when it comes to drapes so why did I choose the RITVA? Built-in pleat tabs! For a truly no-sew pinch pleat drape you’ll need to find panels with builtin pleat tabs!
Before I get too deep into the materials and process, please note that this is pretty tedious. I finished 14 panels for our home and it took 5 or 6 hours total. I broke the project up because I was getting antsy! The good thing is that you can work on the panels at night with a good TV show on in the background! 🙂
MATERIALS
IKEA Ritva Drapes (Sold in sets of two!)
Drapery Rings We’ve been using them paired with these rods for years.
STEP BY STEP
STEP ONE
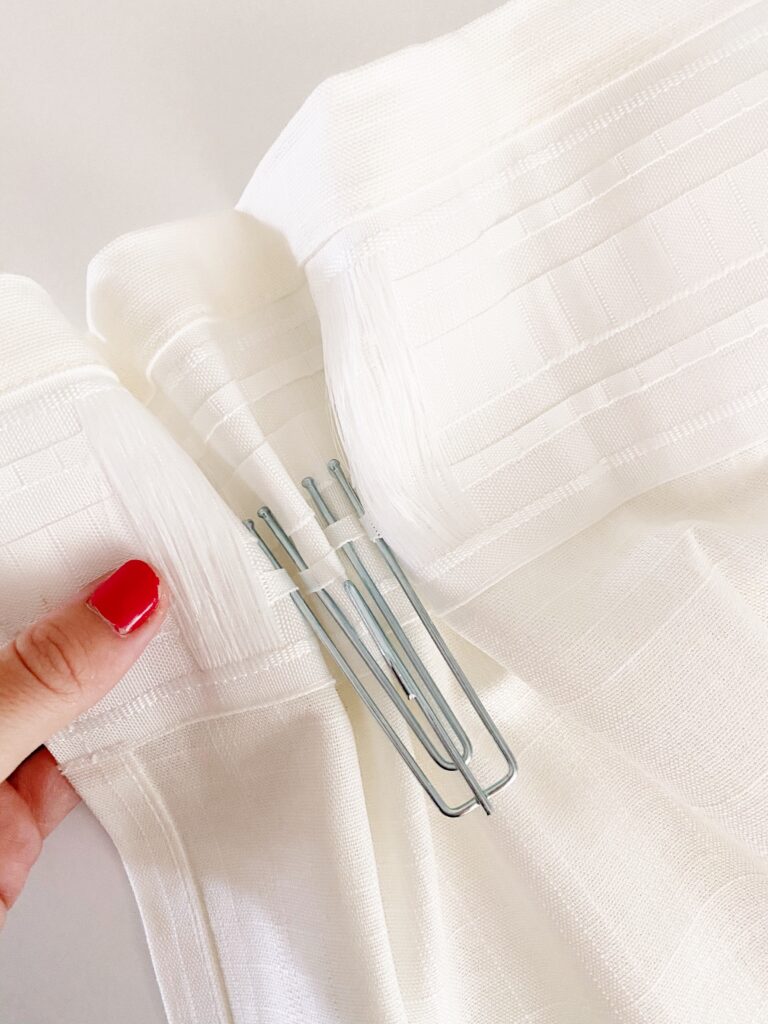
Gather your hooks. Flip your panel over, on the backside you’ll see pleat tabs. For the three pleat style pictured, you’ll need a total of 9 pleat hooks per panel. Each section is broken up by stringy vertical bands – we won’t be using those vertical bands other than as a marker to break up our sections. There will be 9 sections total! I left out the two end pieces on the far left and right of the drapes (where my thumb is in the photo above) for a more casual look.
STEP TWO
Thread Your Hooks. This can be a little tricky and it takes some getting used to. Your first pleat will probably need to be redone as you get your footing and a better feel for how to insert the hook. You’ll want the little balls of the hook inserted toward the ceiling. To create a three pleat, we’re using four-prong pleat hooks. The first prong will be inserted into the very first tab, and from there you’ll skip five tabs before inserting the second prong, and then five more, and then five more. You will need to insert each prong into all three elastic tabs in that column. I recommend inserting all four prongs, five tabs apart in the first row and then working your way up to the second row. This is where it gets tricky and tedious. Threading the prongs through all three rows can be a bit challenging because they’re so tight.
STEP THREE
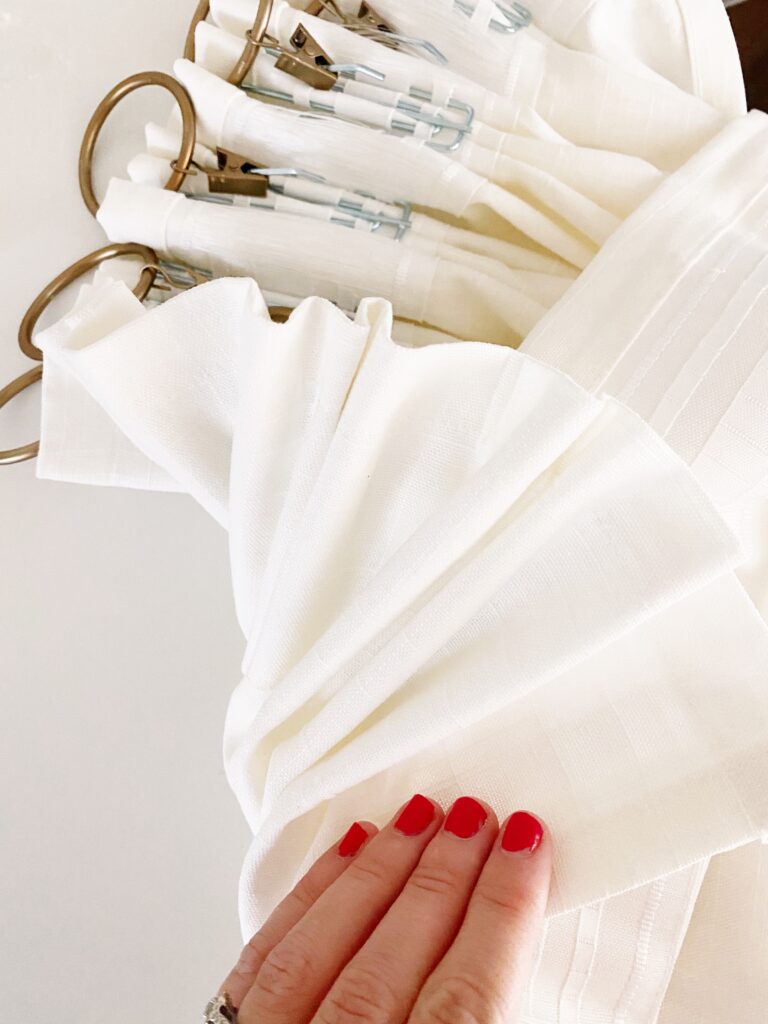
Fix Your Pleat. Once you’ve threaded your first section, flip the drape over to play with your pleat a bit. You’ll want to finagle the fabric a bit to get your desired pleat. It takes a bit of manipulation but it’s not difficult. I recommend fixing each pleat before you move on to the next.
STEP FIVE
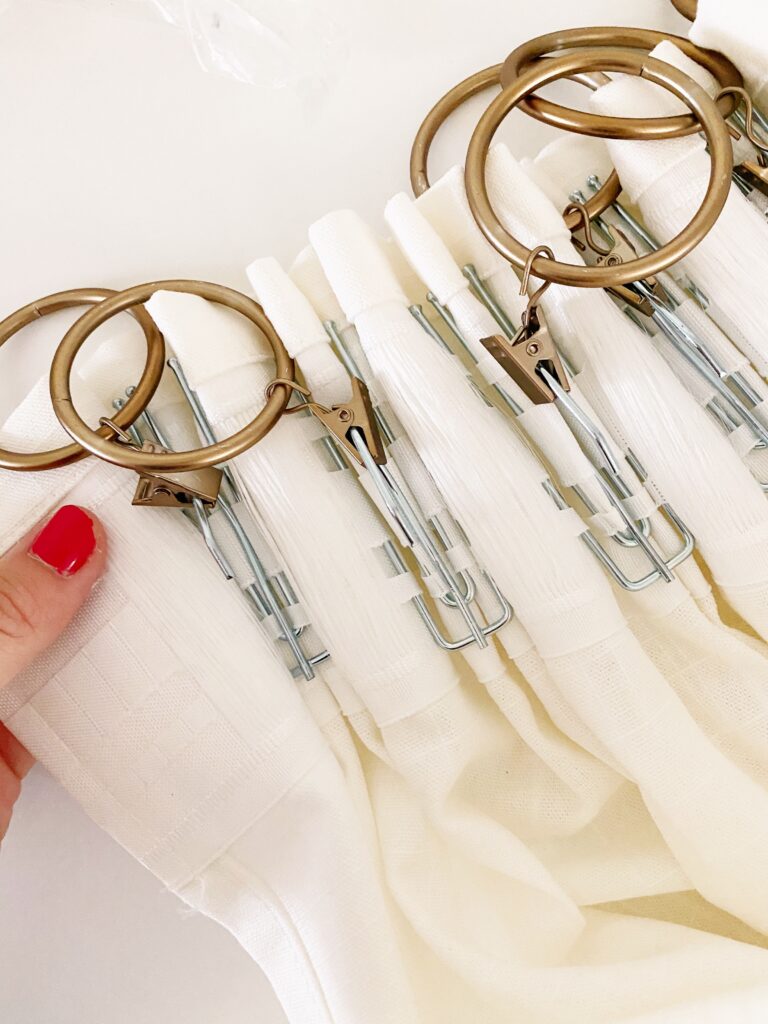
Add your rings! Once you’ve pleated your first panel, clip your rings onto each hook and then you’re ready to hang.
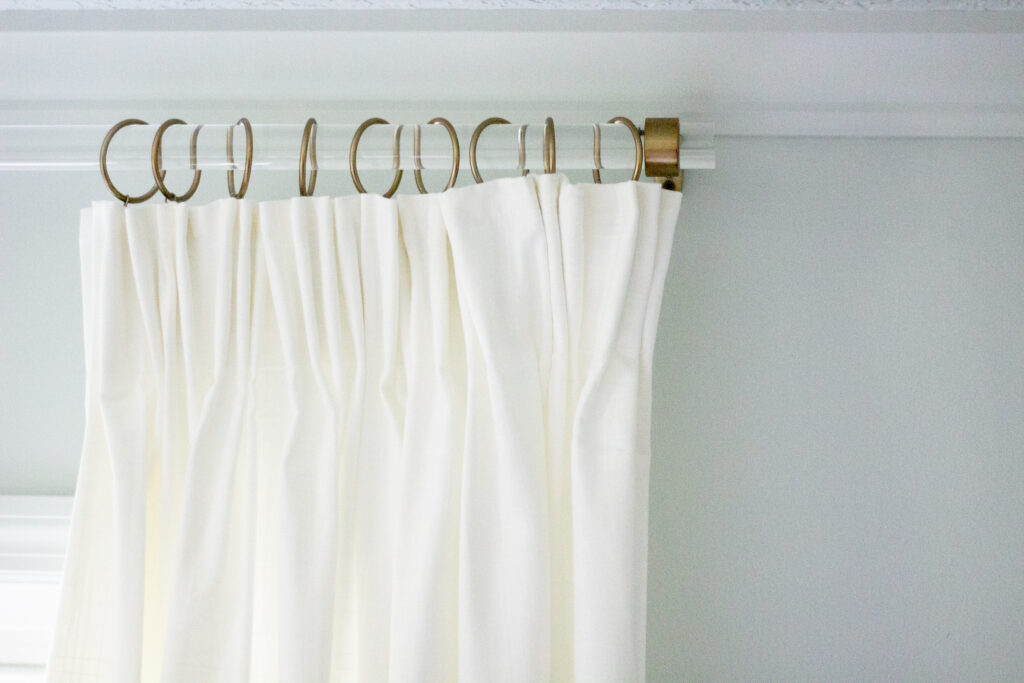
*As I mentioned, we needed to hem ours. For a fully no-sew process I swear by hem tape (the kind you iron!) for quick and easy “custom” drapes.
Not too many steps but definitely tedious! The threading of the prongs gets easier with each pleat and by your 14th panel you’ll be a pro! Haha! I’m sharing a quick video on my Instagram reels today so you can see a bit more of the process! 🙂 My pleats aren’t perfect but I love the look of them and still can’t get over how inexpensive this option was.
Happy pleating!
